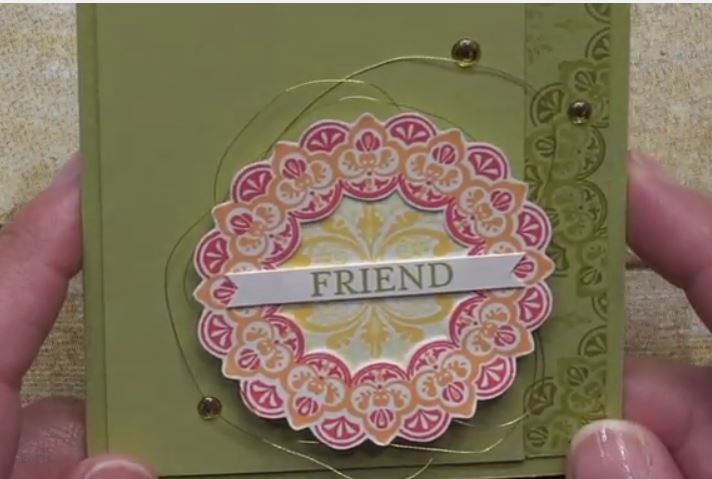
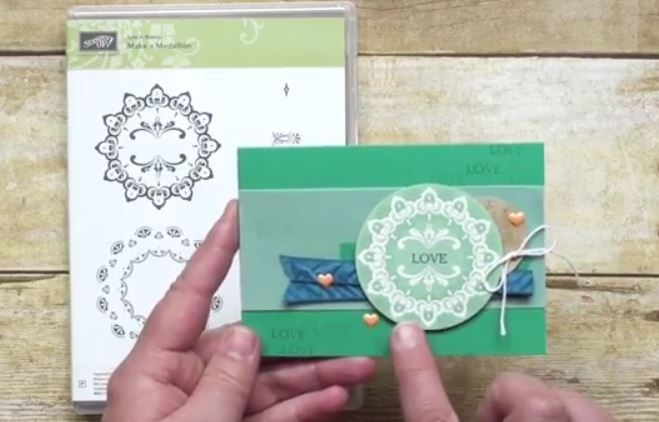
This would have to be my favorite selection from the new release of limited availability SAB items. Such shimmer!!
Place a $50 order with me in March - and you can select this as your freebie!! All orders overy $50 will also go into a drawing for some SAB Celebration prizes! Contact me for details
Here is one of the new additions to the Sale-A-Bration selections! We will be using this set at camp this week. But - this is your ONLY shot to get it! Watch this short Stampin Up video to see fun ways to use the set - so you can decide if you want it as your free item this month!
Second favorite stamp set of this new catalog would be "Chase Your Dreams" - One of the reasons I love it so is.....if you count this castle as a Disney one (hey, it looks like it could be!) then I have been blessed to visit all the landmarks. With the NEW watercolored pencils added to it, coloring it is such fun!
Click on the video below to see a quick 3 minute video on the How To! It's super simple!
You will notice that I used three methods to color the watercolor pencils. The background was done with liberal amounts of pencils and then blended with the water/aquapainter. I colored the castle with a blender pen on all the grey and black areas. The blue I used a clear Stella to blend. All of it is done on whisper white cardstock. The ribbon is a free SAB selection.
This card is so much fun - especially for those of us who love shimmer, coloring and Italy! All of the stamps included in the set take be back to the countryside and coastlines of Italy.
There is nothing fancy needed for this card. If you don't have a Stella, you can use a blender pen to do the coloring. Although the overall effect of the Stella shimmer make the card extra special.
Used in this project: Mediterranean Moments, Memento Black pad, Saraha Sand ink, Clear and Gold Wink of Stella and assorted ink refills.
Here is a quick how to video so you can make your own! Remember this month if you visit my webstore and place any $50 order you get a FREE Sale-A-Bration item AND I will send you the supplies to make some of my January projects!
The first camp of the year is in the books! Here are the 6 projects that we made.
Watch this space over the next week for quick videos on each of the projects. If you missed camp and would like your chance to make some of the cards - here is how.
Simply place an order via my webstore (www.cheri.stampinup.net) for merchandise over $50. As a thank you - you will get the supplies to complete 3 of the projects from me in the mail! AND because it is Sale-A-Bration time - you will also get a FREE item from Stampin Up!
You can visit the webpage for more information! If you place an order and don't yet have your Occasions and SAB catalogs, let me know and I will send those with your project supplies.
I have been hard at work creating the projects for this winters camps! It was easy to do with so many fun new things in the upcoming Occassions 2017 and Sale-A-Bration catalogs.
2017 camps kick off in January with your choice of 2 time slots. Friday January 6 at 7pm or Saturday January 7 at 9 am. I think we will do 8 projects - they are all ready, I just have to figure out how to best work them in with the time we have! Camps are $15 or free with a $50 purchase - and because it is January - you will also get a free Sale-A-bration selection from Stampin Up.
My classes are in Indianapolis - west side. If you have never been or it's been a while - feel free to join us! RSVPs are needed by Jan 1st.
I have moved camp up a week from our traditional time of the middle of the month. Weather often plays a factor in winter camps. This will give me some extra weekends to work with if one needs to be moved. If we are fortunate and get them all in - there may be an additional event in March!
Here are the first three cards of 2017!
These two cards use the stamp set and die cuts Basket Bunch. We will be making a third - using some hearts on a matching card below that can be used as a valentine. No one wants a hollow heart! More chocolate all the time. The dies that go with this set are adorable! They are called Basket Builder framelits and will be available Jan 2. If you don't have a new Occassions catalog - let me know and we can take care of that!
This Engagement congratulations card uses a fun new bundle called Custom Tees. Love it! There are sneak peeks of new paper and some of the FREE SAB ribbon on the card as well!
If you can't make it to camp - but would like to get your hands on one of my cards {for free!} - watch this space to find out how! When I put one of my 3 minute video how to's up I will include the information then!
I have several videos that I have ready - just have been too crazy busy to post them! Keep checking back here and I will try to get them up before Christmas. Today's project features a fun bag - that was all one big experiment to me!
I used Stampin Up's stamp set WONDER OF CHRISTMAS - which if you look a few weeks back, you will see a card that showcases this same set. I had ordered the glassine bags - and wanted to use them at camp, but had not played around with them much - so it was an experiment - but one that turned out well.
I ran the bags thru the Big Shot with the embossing folder. It looks great, but you will see that afterward you need to 'unstick' the two layers from being pressed together.
I stamped using memento black and then colored in with refills and clear Stella. I did not test it to see if it would eventually dry - but be careful when painting, it all stays wet for quite a while. To add to the vintage look AND save time, I simply poured clear powder over the image and heat set it. It looks great in person. With the smearing AND trying to stamp over the dry embossing, you can see some of the image is missing. I just chalked it up to looking vintage!
This is a fun card - it was actually a collaboration between my friend, Tonya, and I. I had an idea in my head - sort of explained it to her and she went to town! It turned out lovely. It is fairly quick - but very easy. Of course when I decided to use it for my swaps for an upcoming event this weekend with Stampin Up! (On Stage in Atlanta) - I didn't account for the glitter accent and running so many of them thru the Big Shot. However - if I was able to create that many for swaps in an evening - it will be a breeze for your Christmas cards.
This set - Twinkle Trees - will be one you reach for year round! Other than the Christmas tree (which really in other colors wouldn't even have to be Christmas) - the bokeh accents are just lovely. There are all kinds of bokeh techniques on the internet, but if you have these stamps - just stamp it! No technique is necessary.
I have included a card with just the backgrounds on a design with the Halloween Cookie Cutters.
I hope you notice little things I do in my videos that can help you in your stamping. In this one you will see that to attach the sequins - add the drops of your glue, then ever so slightly stick your tool in the glue. This will 'grab' your sequins from the container and allow you to easily stick them to your card!
We made this card at camp - it was white on white. I did change it up for my swaps and used the new In Color Sweet Sugarplum as the background. The color is very strong, so stamp off once before stamping onto your card. The other change up from our camp card is I colored the tree in with clear Stella - because frankly I don't see a reason to ever make a card without that Stella sparkle!
If you will be in Atlanta - maybe you will get one of these from me!
Good News! I got two really quick cards on video this weekend. Bad News! It gets dark so early now that it is hard for me to get them done in Natural Light. So - you will see that they both have some shadows and don't show all the sparkle that is on the cards. That said they are done!
My goal in my videos is to keep them as quick as possible. I don't really care to watch someone stamp for over 25 minutes to make one card and I bet that some of you are like me. If you need to slow it down, your video player should be able to do that. This week both videos are just over 3 minutes. Quick enough to give you some inspiration - and watch on your break!
This card uses the holiday mini bundle Star of Light. I love when sets have enough stamps that you can really make the inside special - and this one does! There are several star images included, but this was letting the paper literally shine, so I didn't include any.
A few things:
*Endless color combos are possible - Silver and Gold, Blue and Silvers, Black and metallics, Copper and Pink - start with a background paper you love and base your star colors from that.
*Glitter paper - it is available in so many colors now! When using a more intricate die and the glitter paper in the Big Shot - I find it best to roll it few a couple of times and then flip it over and roll once with the cutting edges off. It ensures that all parts are cut through.
This was my favorite card from October's camp! I don't know if I have enjoyed any technique in over 20 years of stamping as much as watercoloring with the Wink of Stella. So very pretty!
Here is a quick 3 minute video to show you how to make this gorgeous card!
A couple of things you will notice as you watch:
I am coloring with ink refills, you only need a drop or two of each color. While she would be even more stunning in multitudes of color - this is geared for multiples so you can use it for Christmas cards.
For her wings - they are straight Stella, the gold and the clear. Her skin I didn't want to sparkle (she isn't in a Twilight novel, lol) so I colored with a blender pen. When using the refills, always be careful to just pick up a TINY BIT of ink - it is easier to add more than to try to work in a way too dark blob! You will notice that when I begin, I start on her foot. Don't start on a main focal point (her face) that was as the ink becomes lighter on your pen you can move to the more important areas.
I always start coloring from the left of the image - and don't fill all the way in - leave some areas of lighter color and even some white. On her dress you might think at first it looks a hot mess....but the longer you go, it evens itself out. I start with the lighter color (Pool Party) and once that is finished, I pick up a tiny bit of Bermuda Bay and add that between the very left edges and the darkest edge of the Pool Party. Once you watch, you will see what I mean! When you look at the card closely, the coloring is done with a light touch - it is rare that I color in so it is all color from edge to edge
When you have to fussy cut (there is no Big Shot to help cut her out!) don't cut right to the edge of the design, leave a small border of white.
Fuse holds this all together nicely - although the acrylic printed paper is SO pretty - and it gives some depth to adhere it with dimensionals.
Let me know what you think of this card - and if you have any questions about watercoloring!
This card takes a bit longer than some Christmas quickies - but the results give you something to send that will earn it's place on someone's mantle!
This is a great bundle. You can see that I let the embossing powders be the 'star' of this show on this card. Originally I also had the sleigh embossed in copper, but it was one step too much - so I chose the sleigh to shine with the copper foil paper.
I did use red, green, black and silver powders. They give a nice strong outline to the images. Note if you use the red and green that because they are glitter based - you will want to use them heating from the underside of your paper. Once they are melted a quick wave of heat over the top ensures they stick and don't lose the shimmer.
I think I am addicted to the watercolor with the Stella - especially on the Christmas cards it gives such a nice shimmer to all of the colors!
The folder embossed snowflakes were too pale on just white - too blue on the pool party - but a quick wipe over with the white craft ink gave a perfect backdrop for the sleigh. My original card had more trees and an another reindeer - but even this "more is more" girl recognizes when it's just too much!
Those of you attending October camp will get to make and take this home! Can't make it? Watch for my camp to go offering!
This card is almost as much fun to make as it is to give!
A little bit of two step stamping - and a little watercolor with a blender pen - all you need to pull off this.
Not only is the camper old style, but the stamp set is too. What do I mean by that? There is no Big Shot accessory set with it, so it will require just a touch of fussy cutting.....Not too much as most of the photopolymer allow for perfect positioning while stamping.
Because we had made this card at camp in September, I opted to use the ink spots (collected from past Paper Pumpkin kits) - but you can easily swap those over for full size pads and/or markers.
Happy World Card Making Day (seems like they should have combined this with World Coffee Day that was earlier this week, lol). Do you have plans to make a card? If you make any Stampin Up card THIS WEEKEND, snap a quick pic and add it to the comments on this same post on my Facebook page! I will draw from the names for a $10 gift certificate!! Watch this space for further specials! Happy Stampin! You can find my Facebook Page here - https://www.facebook.com/Cherish-art-and-inspiration-150399058335135/
Here in the midwest we have been enjoying an Indian Summer. Literally have not had socks nor a jacket on since late spring! Well - autumn kissed us last night - the air is crisp and bright.
Perfect time to whip out this all seasonal card featuring Totally Trees by Stampin' Up!
With the images included you will be able to use this set year round. Several pieces will work as background and what's always a plus - it works for guy cards!
This video is under 2 minutes. Switch out the colors and you can do the same quick card EVERY season!
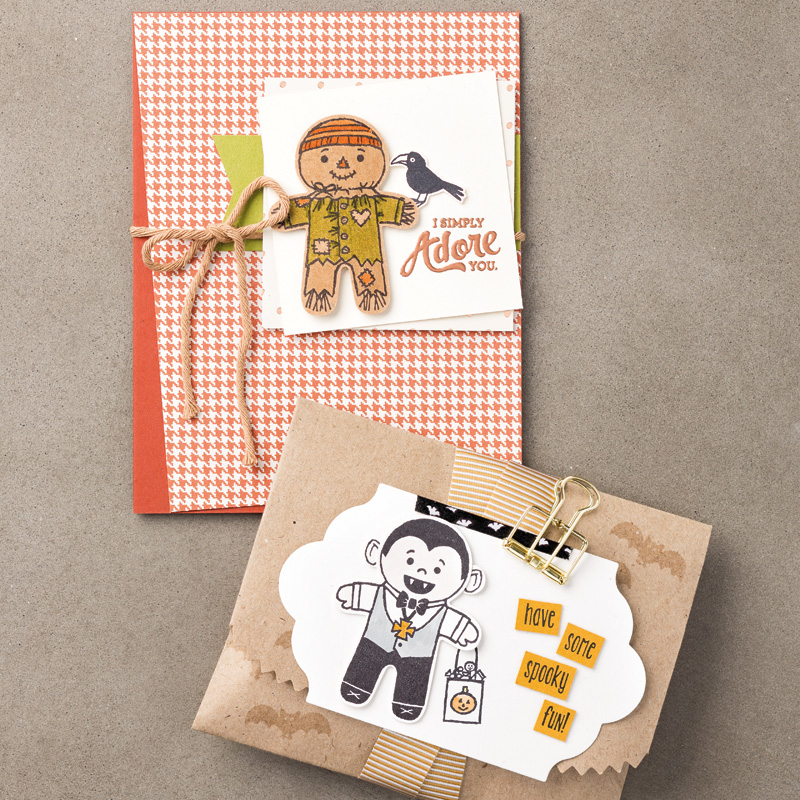
Here is literally a 2 minute video on how to make this super easy, but such fun card featuring the Cookie Cutters - Halloween stamp set from the current Holiday Mini.
A couple of hints - the folder is 3D - super thick. I ran it thru my Big Shot with the new platform LESS the thin die adaptor and used only ONE cutting plate on the top. You can have a deeper indentation if you want, but for this card it was plenty as is!
The frame is made with the new Square thinlets. Nestle one RIGHT INSIDE the other and it cuts a perfect little scallop frame. There are so many die sizes - you can frame anything, lol.
The orange glitter paper is super sparkly and a nice addition to the colors already available.
If you watch carefully, you can see my little tip on how to adhere something so thin. Simply lay it on a piece of backing from dimensionals. When you roll the fuse over the frame, it won't stick to the backing and all clings back onto itself and whatever you are sticking down! Fave tip of the day for you!
Order this set and punch via my webstore - see link on the sidebar - and I will send you all of the card pieces by mail so you can stamp whichever card is your favorite! Offer expires Oct 10, 2016.
One day the stars might align....My space will be clean. I will have some spare time. All of my 'stuff' is put in its proper place. Today it is one out of three! I still have all my camp buckets out, hoping to video the projects soon - and I need to run some errands.
But the space is clean. And oh, so, inviting. If only I could just spend some time working on some scrapbooks - that is what I want to do.
For now - just take a peek into my Stampin Up creating space!
I used several new items on these cards! They can be used for October birthdays - or include them with a treat to send to the little ones you might not have the chance to see in person for fall festivities!
One fun new thing is the first ever 3D embossing folder - this thing is so.....hefty, lol. When I first took it out of the packaging I thought it must have had cardboard in it - but nope! It is just really sturdy.
It’s easy to make a great impression! Just place flat cardstock in this embossing folder, run it through the Big Shot, and out comes cardstock with a bold textured design.
Dynamic Textured Impressions Embossing Folders take embossing to the next level, with deeper, more detailed impressions than standard embossing folders—great for card fronts and accents.
* 1 folder
* 6" x 6" (15.2 x 15.2 cm)
* Use with Big Shot
New to the Holiday Mini are the stamps - Cookie Cutter Halloween and the ORANGE glimmer paper. I love the glitter papers, so having another color is always fun!
Cookie Cutter Halloween Wood-Mount Stamp Set
142252
Price: $23.00
This is your official warning: Just a few stamps in and you may find yourself liking these gingerbread-shaped Halloween characters better than your real-life friends. We're only a little sorry about that.
Our classic wood-mount rubber stamps * Have deeply etched images so you get a superior stamped impression each time. * Are precut so you don't have to trim. * Come with farmed-maple wood blocks—you don't need to buy blocks separately. * Permanently mount on the blocks so they're ready to go when you are. * Come packaged in cases with images on the spine for easy storage and quick reference.
Quantity: 10 rubber stamps
The Labeler stamps are new this year and are in the regular catalog. Watch soon for the How To Video!
Purchase this set by Sept 30 - and I will send you the ready cut pieces of cardstock and frames so you can make your own!
Love this bundle! I was pleased the top panel was so pretty, because the bottom card front is so stinkin cute it was hard to cover it up!!
This is one of my September camp projects - although camp is full this time. We will use the set again in October :) It reminds me of my wardrobe in the 70s!